Benefits of Sound Deadeners for Cars: Where to Install Sound Deadening Material
![]() by Thomas Jackon · Sep 30, 2022
by Thomas Jackon · Sep 30, 2022
A new car’s main appeal is often attributed to things that degrade the fastest. For appearance, these are generally high contrast pieces like the sun-exposed plastic and the headlights. For sound, an often overlooked attribute in this regard, the isolation of inside noises and elimination of outside ones can also degrade. As your car ages, the seals, jambs and grommets that filter out the unwanted noise start wearing down. This can result in the seeping of road noises.
However, if applied correctly, the right automotive sound deadening material can make your car sound brand new again. Many people don’t have a clue how much they need to wrap their external noise-prone areas with automotive sound deadening material, until they do it. It’s considered the holy grail of car acoustics. Here’s everything you need to know about adding sound deadening to your car.
Before I get into the details, know that sound deadening can serve three purposes – prevent external sounds from coming inside, stop inside sounds from going out, and reduce the effects of rattling and vibration. The only downside is that sound deadening material can add a bit of extra weight, about 5-6kg for the doors alone, for instance. So, if you’re someone who races and takes out the spare tyre, door cards and the back seats to lower the weight for the track, it isn’t for you. For casual drivers who don’t care about high-speed performance, keep reading.
Best Places to Install Sound Deadening Materials
Sound deadening material is commonly thought of as a shield from external noises. However, the truth is that it’s more of a sound absorber. It absorbs sound by sticking to the surface, reducing its ability to vibrate. Picture an empty can on a table. Now imagine flicking it. The sound it produces can be obnoxious. Now imagine holding it with one hand and flicking it with the other. No more ringing and resonating, but instead, all you get is a short tink. Car sound deadening works the same way.
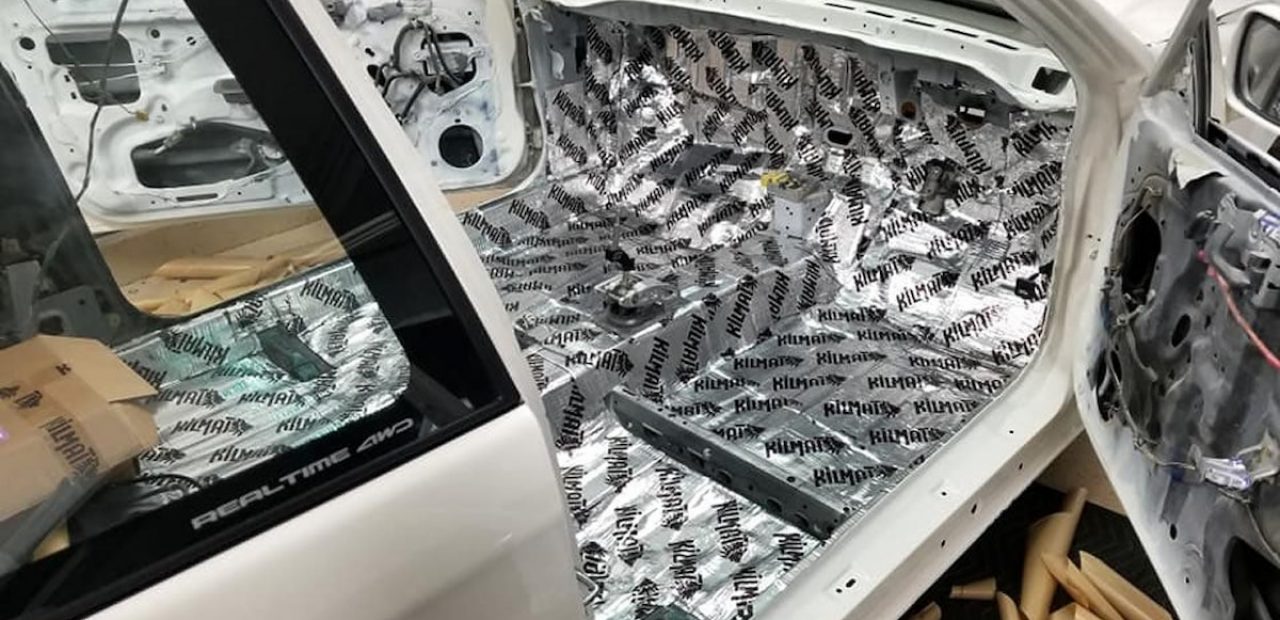
The sheet of carbon steel that forms the outer body of your door is the empty can, while the thick tar and aluminium sound deadening material is the hand you hold the can with. Instead of covering up all the spaces in your car to block out external noise, all you have to do is find the spaces in the door’s body and frames where you can reduce the loud, obnoxious noises into short tinks.
The best way to figure out the rest of the places where sound deadening would be great for use is to simply tap every piece of metal inside the car, and if you hear low pitch ringing, place material on it. Most luxury vehicles already come with a light dressing of rubber on the door body to absorb most of the road noise, but as aforementioned, this can degrade over time. This is a result of the hot and cold cycles, and if your vehicle is a few years old, it’s gone through thousands of hot and cold cycles. As a result, your factory sound absorber has probably cured and is less effective if not completely useless.
Installing Sound Deadening Materials
Installing sound deadening materials can take up to 5 hours. You’ll need several tools to successfully pull off the installation, including a sound deadener, tennis ball, replacement door clips, hand pruning shears, auto body repair tape, 3M weatherstrip adhesive, panel popper kit, Phillips head screwdriver, Torx screwdrivers size 8 and 6, cleaning solution, clean rags, and sound deadening materials.
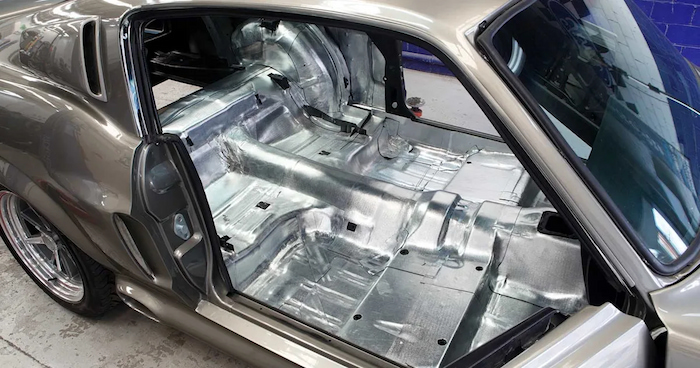
First, you’ll have to remove the door cards. Then, remove the speaker housing and unscrew the control unit. Next, carefully remove the metal tape strip located at the top of the foam liner before removing the foam liner itself. You’ll reapply the foam piece, so don’t damage it too much. Peel off the string of stock sealant. After you’ve done all this, your doors should be exposed to their bare metal.
On titanium trims, however, there are one or two cubby-shaped plastics whose purpose is to provide an air-tight seal. However, they will probably be hardened and won’t serve much of a purpose anymore. If your doors have any, remove them, as you’ll replace them with much stronger materials.
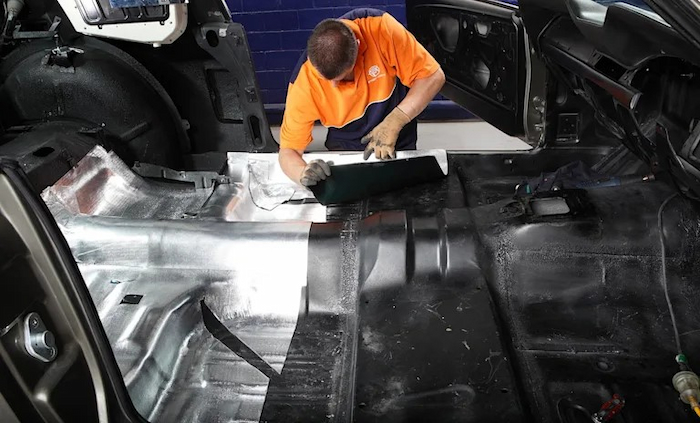
Secondly, clean the inside of the doors using a cleaning solvent. The adhesive solution from the sound deadening material requires a clean surface to ensure a tight seal.
Start by laying out the sound deadening material and cut it so that it covers the most surface area on the door panels. Once done, chop it up into smaller pieces so that it fits more easily through the holes in the door frame. After they’re cut out, stick them to the inside panel and press the roller hard into the material. Most sound deadeners come with ridges that let you know when you’re done rolling.
Once that’s done, turn your attention to the frame. Find the spots that produce a ‘tonng” noise, and apply material to those places. If you come across rounded edges where the rolling tool can’t reach, use a tennis ball.
Last but not least, plug the holes in the door frame permanently. Keep in mind that if you have to work on the track, windows or wire looms in the future, you’ll have to cut through the sheet of the sound deadener.