Installing an Outback Exhaust System on a Toyota Landcruiser 79 Series: A Step-by-Step Guide
![]() by Thomas Jackon · May 15, 2024
by Thomas Jackon · May 15, 2024
The Toyota Landcruiser 79 Series, with its rugged charm and unparalleled durability, has long been the choice of adventurers, tradies, and off-road enthusiasts. Known for its formidable 4.5L V8 engine and a chassis that laughs in the face of rough terrain, the 79 Series is as close to unstoppable as a vehicle gets.
Yet, for all its strengths, many owners look to push the envelope further, enhancing their vehicle to match their specific needs and driving conditions. One of the most popular modifications is the replacement of the stock exhaust with a high-performance system, such as the Outback Exhaust System designed to suit the Toyota Landcruiser 79 Series.
Contents
Why Replace Your Stock Exhaust?
The reasons for swapping out the factory-installed exhaust system for an aftermarket option like the Outback 79 Series exhaust system are manifold. Performance is often at the top of the list, with aftermarket systems offering improved exhaust flow, which translates to better horsepower and torque. Fuel efficiency can also see a welcome increase, thanks to the more efficient expulsion of exhaust gases. Additionally, the sound of the vehicle becomes deeper and more pronounced, a feature that many enthusiasts find appealing. Lastly, a ceramic-coated exhaust not only enhances the vehicle’s appearance but also provides superior heat resistance, further improving the system’s efficiency.
Preparing for Installation
Before diving into the installation process, it’s crucial to ensure you have all the necessary tools and safety equipment on hand. You’ll need a basic socket set, wrenches, screwdrivers, a jack and jack stands (or access to a vehicle lift), exhaust sealant (if recommended by the manufacturer), and safety glasses. It’s also wise to work in a well-ventilated area, as you’ll be dealing with exhaust components.
Step-by-Step Installation Guide
Step 1: Vehicle Preparation
Begin by parking your Landcruiser on a flat, stable surface and applying the parking brake. If using jack stands, carefully lift the vehicle and secure it before proceeding.
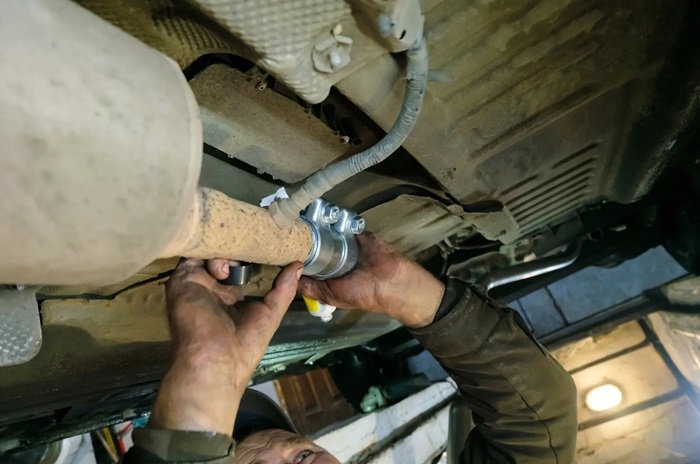
Step 2: Removing the Stock Exhaust
Locate the bolts connecting the stock exhaust system to the diesel particulate filter (DPF). These are typically found at the rear of the DPF. Using the appropriate socket, loosen and remove these bolts. You may need to use penetrating oil if the bolts are rusted or seized. Support the exhaust as you remove the final bolts to prevent it from falling. Once free, carefully remove the stock exhaust system from the vehicle.
Step 3: Preparing the New Exhaust
Unbox the Outback Exhaust System and lay out all components. Double-check to ensure all parts are present and undamaged. If your kit includes new gaskets or sealing rings, prepare these for installation. Some systems may also recommend the use of exhaust sealant for a better seal.
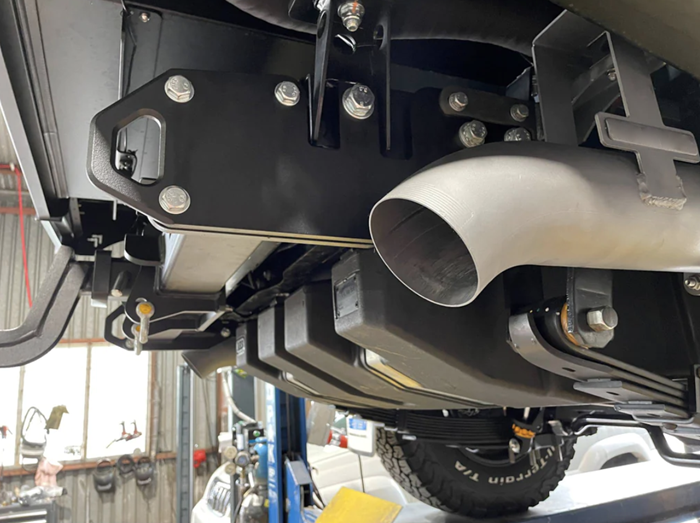
Step 4: Installing the New Exhaust
Starting from the connection to the DPF, begin attaching your new Outback Exhaust components. If your system is sectioned, start with the piece closest to the DPF and work your way back.
Hand-tighten the bolts at first to allow for some adjustment and alignment of the entire system before final tightening.
Once all components are loosely fitted, adjust the system to ensure it’s properly aligned and not in contact with any part of the vehicle’s undercarriage or body. This is crucial to prevent vibration and noise.
After aligning, tighten all connections starting from the front and moving towards the back of the vehicle. Ensure all clamps and bolts are secure but be careful not to over-tighten, as this could strip the threads or damage components.
Step 5: Final Checks and Testing
Once everything is tightened and in place, give the entire system one last inspection to ensure there are no loose parts and that the exhaust is not touching any part of the vehicle.
Lower the vehicle if it was lifted and start the engine. Let it idle and listen for any leaks. A hissing or popping sound could indicate a leak, which would require re-checking the connections.
Take the vehicle for a short test drive to ensure everything is working correctly. Pay attention to the sound of the exhaust and the performance of the vehicle.
Step 6: Maintenance
Remember, aftermarket exhaust systems require regular checks and maintenance. Make it a habit to inspect your exhaust during routine vehicle maintenance.
Conclusion
Installing an aftermarket exhaust system like the Outback Exhaust System on your Toyota Landcruiser 79 Series can significantly enhance the vehicle’s performance, efficiency, and sound. While the process requires some mechanical knowledge and patience, the results are often well worth the effort. Always follow the manufacturer’s instructions closely, use the right tools, and prioritize safety throughout the installation process. Once installed, enjoy the new roar and responsiveness of your Landcruiser, knowing it’s now even better suited to tackle whatever adventures lie ahead.